
After lots of planning, some trial and error, and tons of work, our home office is finally done! It took longer than we expected. There were so many projects within this one room!
We’ve loved the idea of a steampunk-inspired home office for years, but I’ve found that many people are unfamiliar with steampunk style. I describe steampunk as an eclectic mix of old-school science fiction, steam-powered machinery, and Victorian style. If you’d like to see examples of the look, check out my Steampunk Flare board on my Pinterest page.
I wanted a home office that was not just pleasant to look at, but functional too. That is one reason why I haven’t hidden wires and plugs in any of these pictures. What you see is how it actually functions. No cordless lamps here! Plus, steampunk isn’t known for being wireless. In fact, hubby had an idea to put copper wires on the walls just for decor. 😛
Here’s a look down memory lane at what our home office looked like a over a year ago:
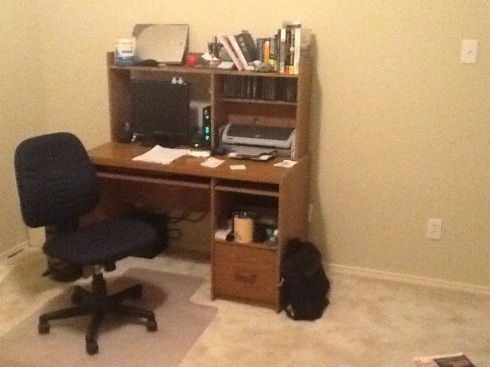
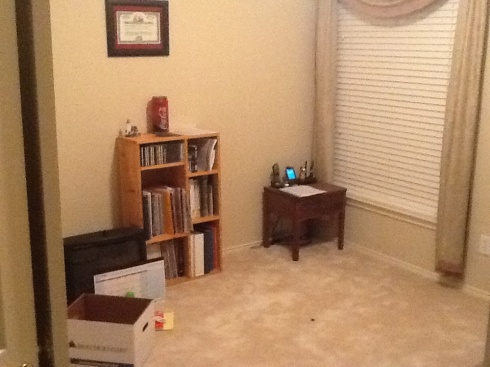
Have you ever noticed the quality of Before photos never matches the quality of After photos? I wish I had taken a picture with a high-quality camera for the Before shot so you could see the blandness in all of its high definition glory.
It was an office to go in, do a job, and get out. There was barely enough room on the desktop for a sheet of paper.
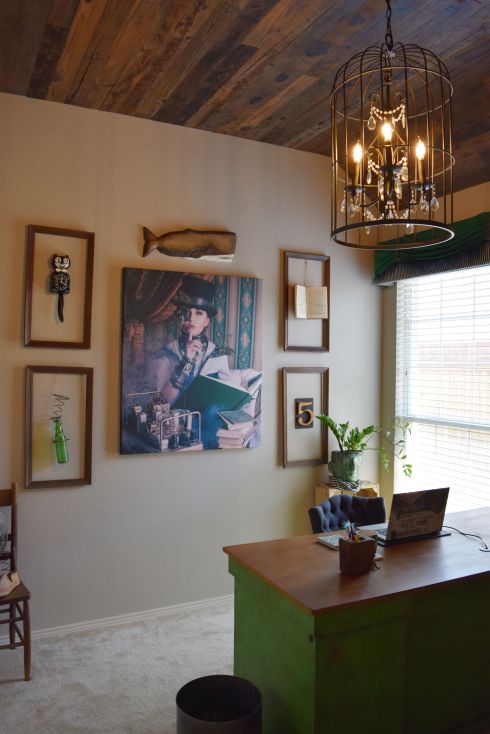
Now we have a home office with some personality and a place we don’t mind lingering. When entering, we no longer feel dread and annoyance, but instead see a room that invites creativity and lingering conversations.
Many Projects, Many Decisions
There were so many decisions to make with this room! We decided to make it a more steampunk-inspired office rather than strictly steampunk. If someday we decide to put copper pipes all over the walls, we can always add it later. 😊
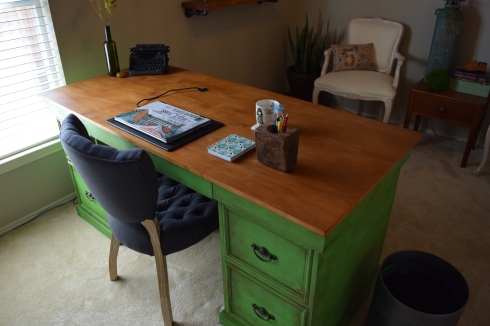
One decision we had to think through was how to make a green steampunk desk that could be used while sitting or standing.
A Standing Desk (with Drawers!)
They say sitting all day is the new smoking.
Have you seen desks that raise and lower to allow for sitting or standing? They make some that either sit on your desk or the desks have adjustable feet that support a large flat surface. As people are becoming more aware of the detrimental health effects of sitting all day, standing desks are becoming more common.
I’m betting you haven’t seen a standing desk with drawer storage—until now. A modern standing desk isn’t exactly steampunk, so one of the first things we did was design and build a sit and stand desk with drawers! Because why not? 😀
I would have loved to buy one, but after spending so many hours searching for a traditional-looking desk with drawers that could also lift and lower, we realized we were on our own. We’ve built furniture with plans before, but this was the first time we built something from scratch–and as far as we knew, had never been done before. We used a cabinet plan from Anna White’s site as a starting point.
We designed the desk together, hubby did the woodworking, and I painted, distressed, stained, and waxed it.
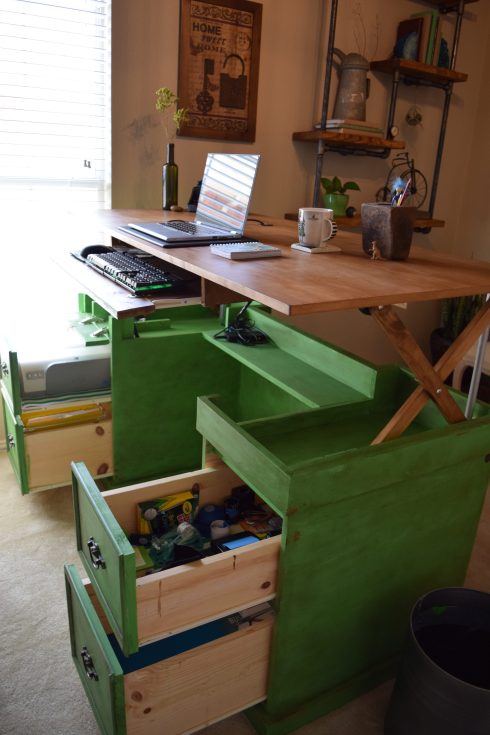
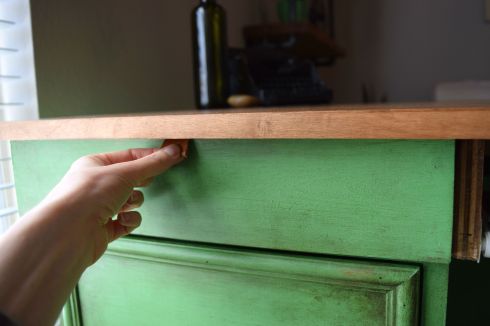
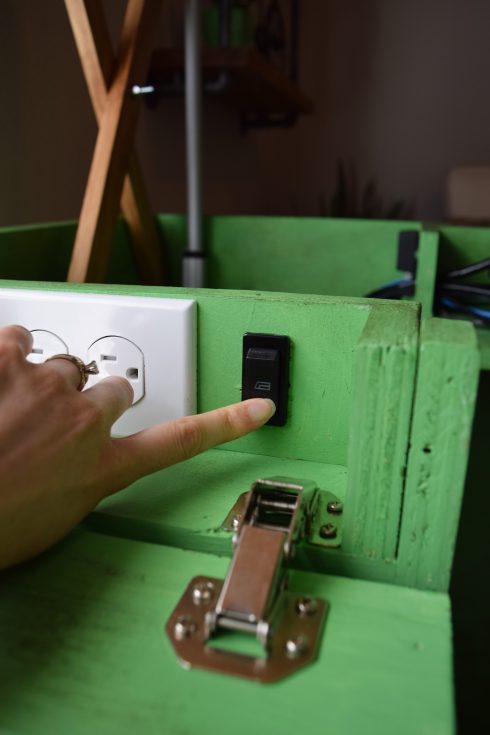
To raise the desk, we open a compartment and push a button.
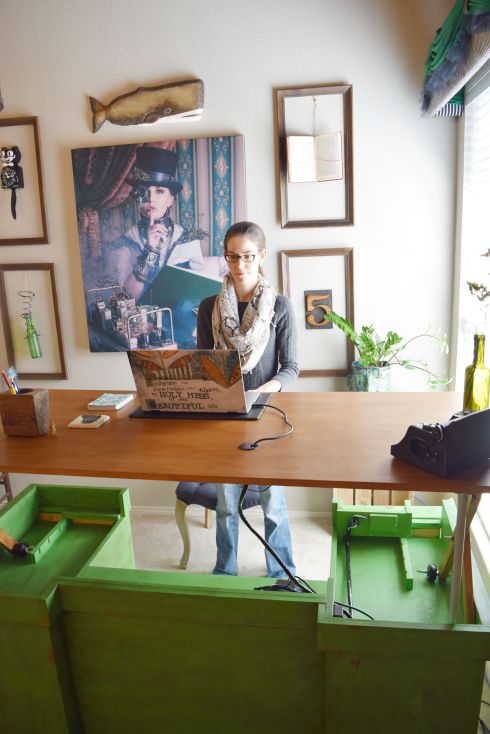
We added a hole in the desk to allow for as many monitors as we needed. A wire sleeve contains the cords to give a cleaner look. I ended up not using the other monitors so we removed them.
I’d like to get a laptop stand so the monitor is closer to eye level, but it works for now.
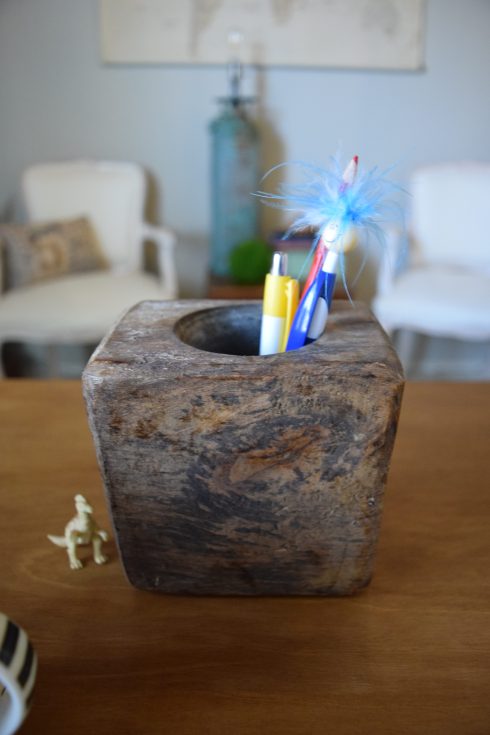
A co-worker gave me the joy rock. I have it on my desk as a reminder to keep joy in what I do.
Way More Than 50 Shades of Gray
After a long deliberation of warm grays, we painted the walls Castle Path by Behr. It was exactly what I was looking for to give a warm, inviting feeling to the room.
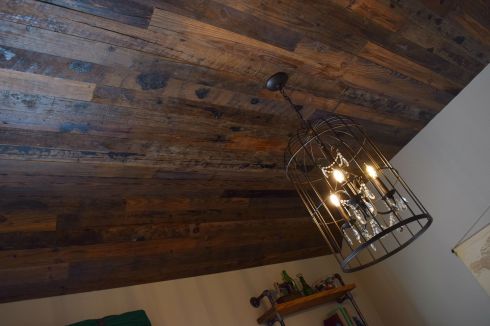
A White Ceiling Isn’t Steampunk
To truly get the look and feel we were going for, we planked the 10-foot ceiling with reclaimed wood. Don’t believe the DIY tutorials that say it’s as easy as 1, 2, 3. This project was a beast.
The desk and the ceiling were the hardest parts of the room by far. After we finished the desk and the ceiling, we took a break for a few weeks.
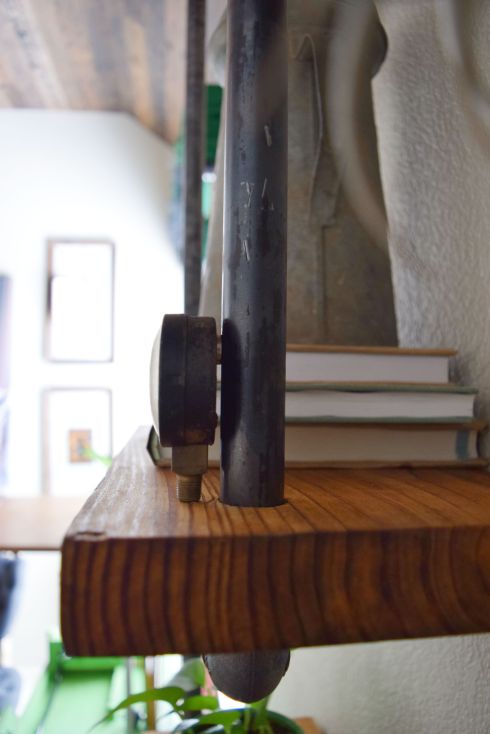
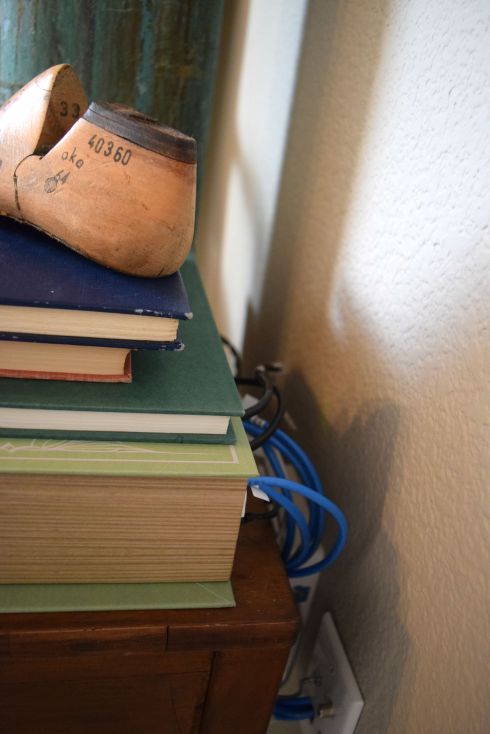
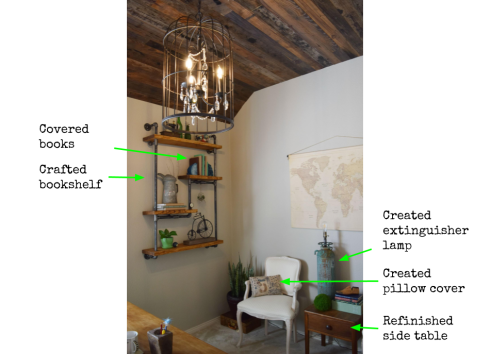
Industrial Pipe Bookshelf
After much-needed rest, we began to plan the wall décor. We knew we wanted an industrial pipe bookshelf. It’s pretty popular so we were able to find some tutorials online (although the two smaller shelves is something we added). I used 5-6 coats of dark tung oil, letting it dry at least 24 hours between coats.
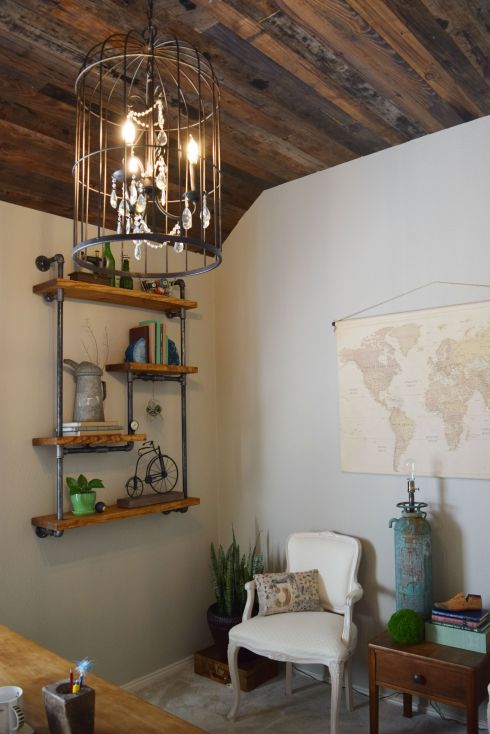

We bought an old gauge in Roundtop last year and attached it to the pipe shelf using a magnet.
I created covers for my books, to help them blend in better.
Hidden Router Box
The router is something that didn’t go with the steampunk look, so I searched for creative ways to hide it. I found a box that looks like a decorative old book that’s meant for such a thing. I just slid it inside, and voila!
One thing you want to think about when disguising your router is that you don’t want it to overheat. The box should allow enough room around the box that it can breathe and stay cool.
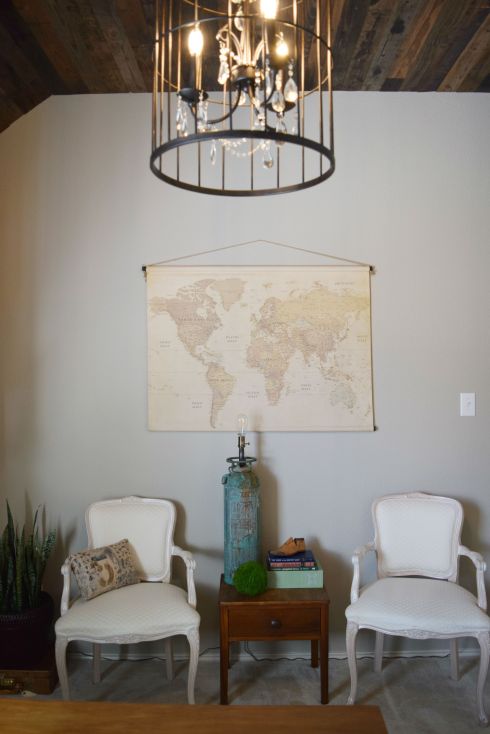
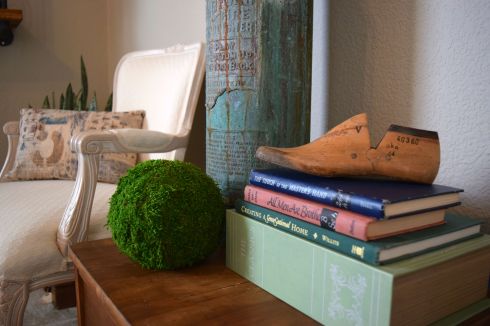
My parents had this side table in their bedroom when I was young. I refinished it with a refinishing wax and replaced the wooden knob with one I had on my dresser when was a little girl.
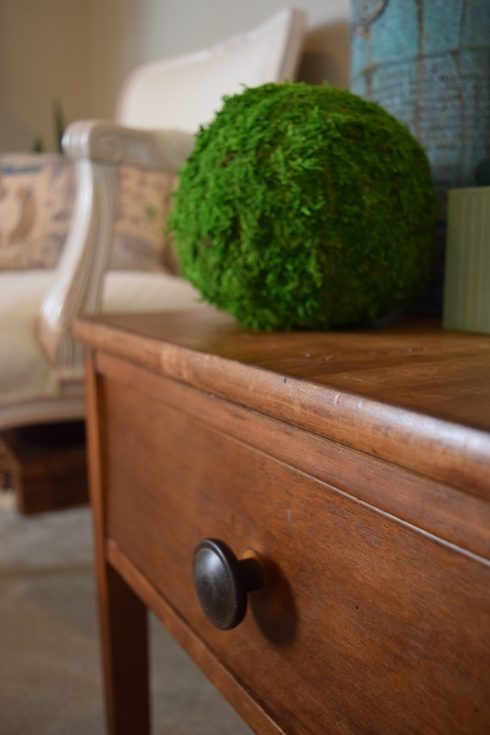
Because steampunk is an old look, I wanted to keep the imperfections. I love how the wax really brought out the color.
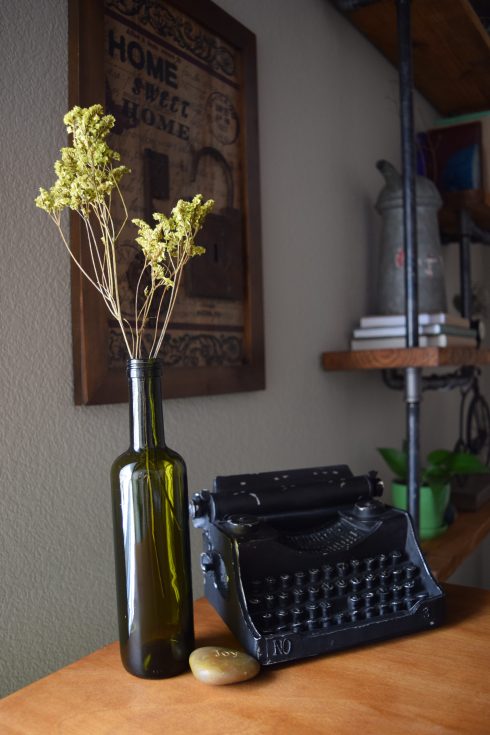
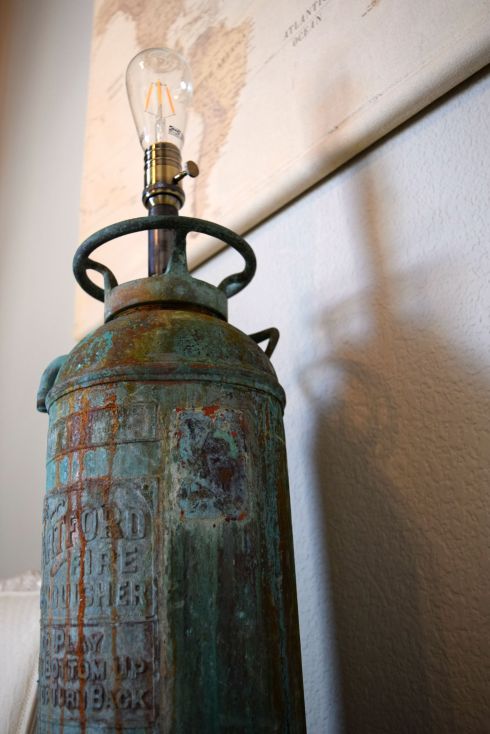
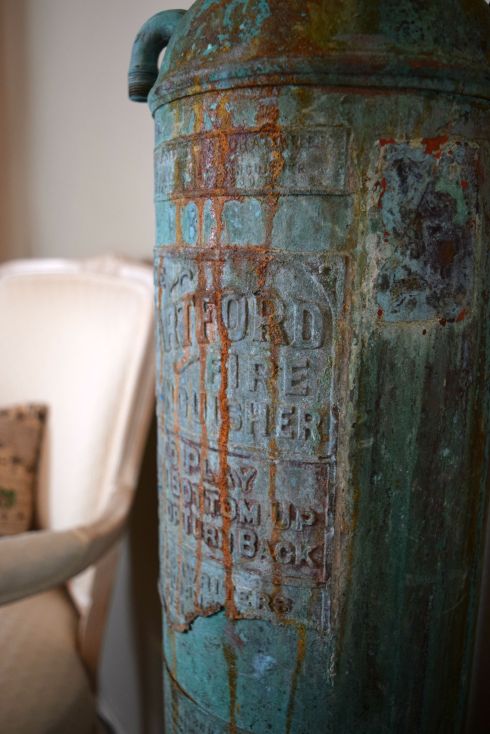
Vintage Fire Extinguisher Lamp
We created a vintage fire extinguisher lamp for the side table. We’re using a vintage-style LED bulb since there is no shade. It puts off a nice, warm glow and isn’t overpowering.
I had intended to refinish the chairs in a peacock blue color, but then decided to keep them the color they are. I brought in some muted color with a pillow.
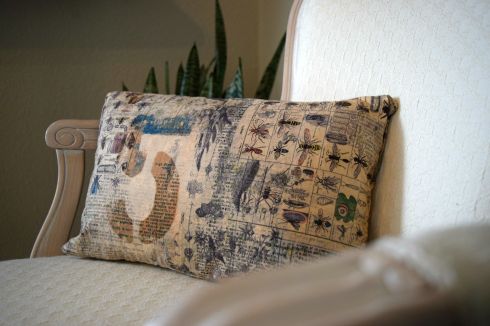
Pillow Cover
I had sewn a peacock blue satin pillow, but then decided it was too vibrant and shiny, so I sewed a new cover. Hooray for trial and error! 😊 😐 I was digging the entomology bug fabric, and the vintage looking number echoes the vintage number on the opposite wall.
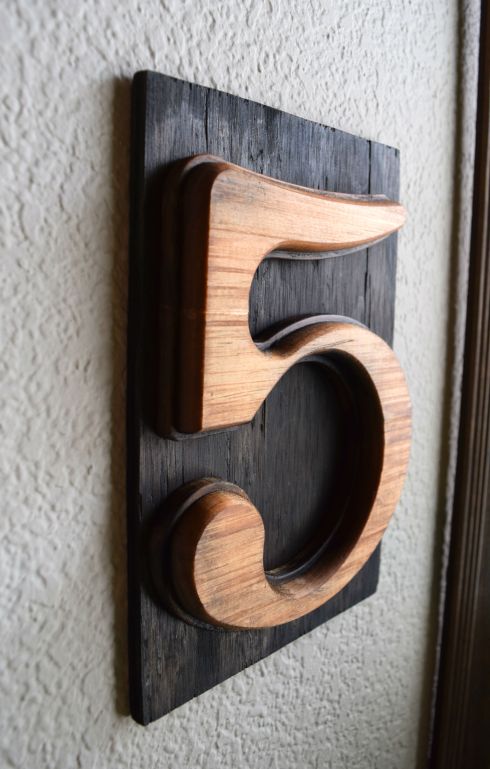
I made the wooden 5 using a scrap of wood with black acrylic paint to give an inky look and dark tung oil for the wooden number.
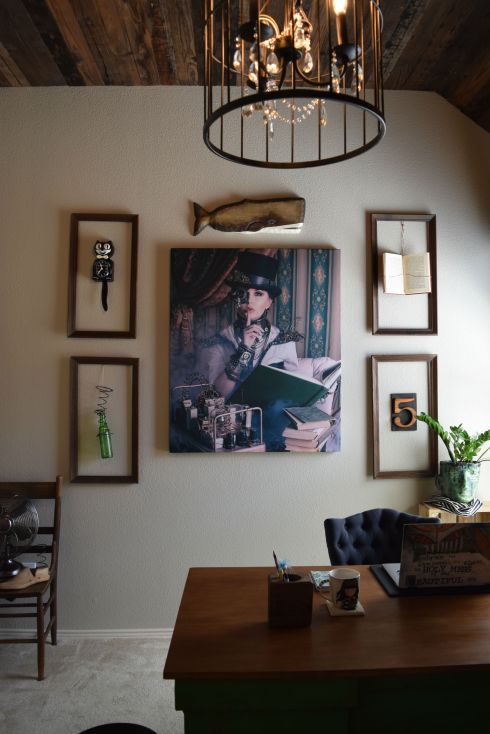
A Secret Stash of Knowledge
Something “secret” or “hidden” in the room reminded us of an old steampunk library. It would have been exciting to have a secret passageway, but the functionality of it didn’t make sense and it would have been a lot of work. However, something that could help me rein-in my Post-it-note addiction would be useful. What about writing my notes and thoughts on a whiteboard that I could erase as needed? The only problem is a whiteboard isn’t very steampunk.
How about a picture with a whiteboard hidden underneath?
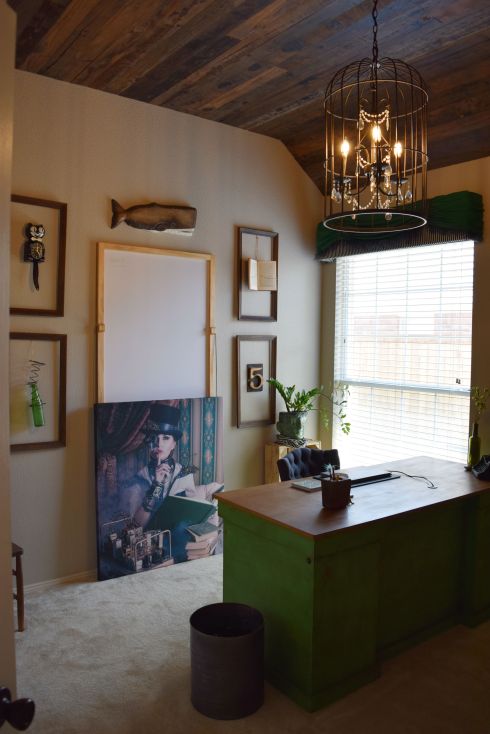
Originally, we wanted something that slid to the side, but the frames and 3-D objects I wanted to hang on the wall would have gotten in the way and the slider we would have needed was over $100. That was more than I wanted to spend. After several iterations, we came up with what we have now.
Back Wall
This chair is one my mom gave me that’s been passed down through the generations. The fan may come in handy in the summer months.
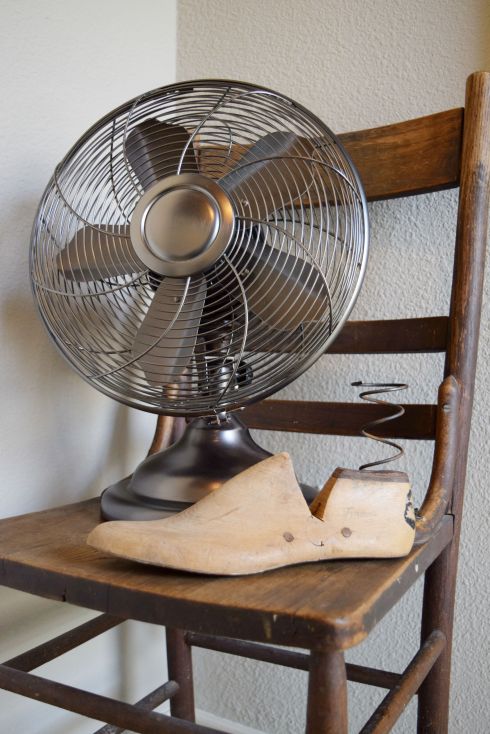
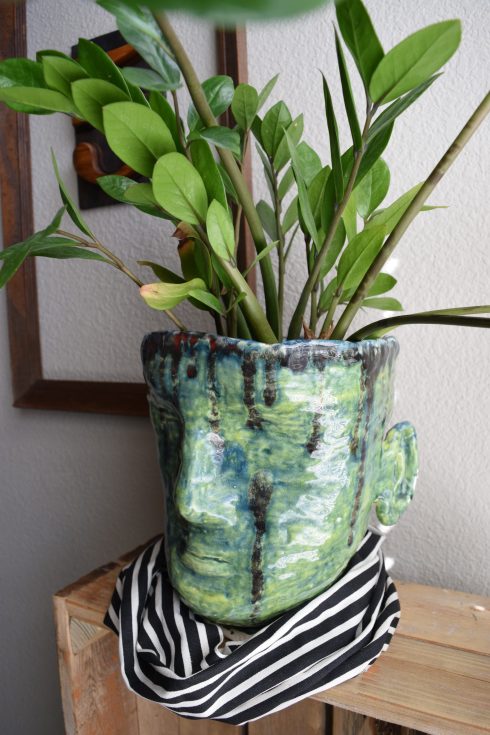
I made this head in my high school art class.
Let There Be Light
I wanted maximum light to come in the room since the room tends to be somewhat dark. That was my main goal when considering a window treatment.
A Light and Bright Steampunk Window Treatment
Panels and swags were out since they cover the top and sides of the window. I decided a straight cornice board above the window would maximize my natural lighting. However, I also wanted something with some curves to balance all the straight lines in that area of the room. I created a cornice board using an online tutorial and then draped fabric over it. Like the desk, I couldn’t find anything online, so I made a quick sketch and began constructing it.
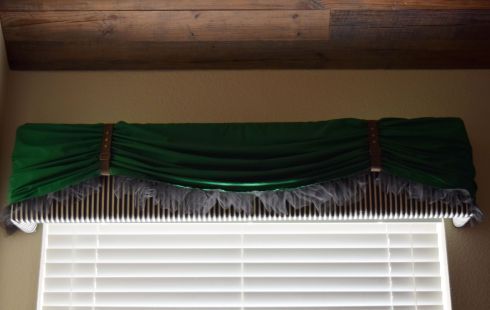
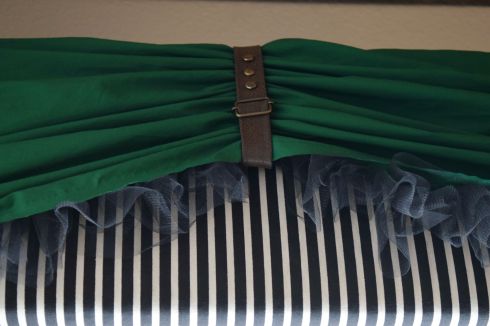
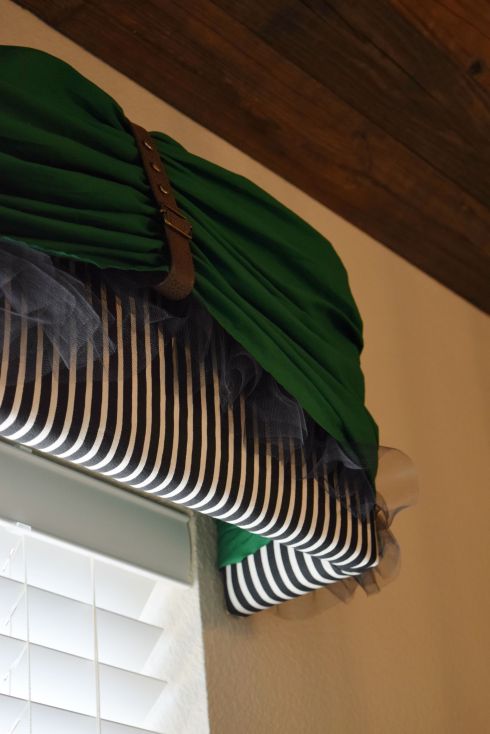
It reminds me of a steampunk bustle.
Birdcage Chandelier
The light fixture was one of the last things we purchased. We both agreed that we would purchase something ready to go, rather than making it from scratch (whew!). I originally pictured a round industrial style light, but those can get pricey! Plus, hubby was digging something a little more steampunk. I wanted to somehow incorporate an old birdcage in the room so when we found this birdcage chandelier at our local Habitat for Humanity ReStore, we grabbed it! Plus, we saved 25% with a coupon we received in the mail. Good times!
Where Did Everything Come From?
We made a lot of the things in the room. Some of the things were given to us, and others we found. It takes more effort, but we were able to achieve the look and functionality we were going for without settling for what the stores say we should buy. It didn’t feel freeing in the process, but when you think about it, it’s freeing to be able to create solutions for aesthetic desires and functional desires that you can’t find in the marketplace—and pay less.
Here’s a visual of the projects we did together: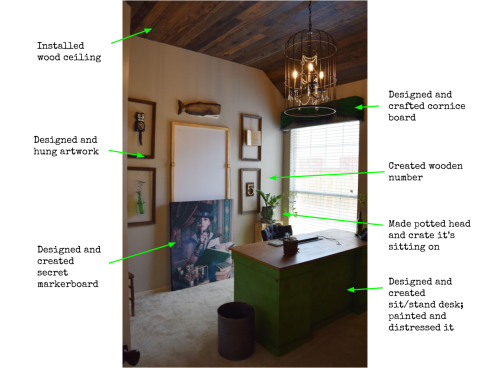
One thing I was looking for was a steampunk phone with caller ID and memory buttons. I have searched far and wide but haven’t found one. Surely I don’t need to make one…
I plan on posting tutorials of some of our projects so stay tuned!
I want to hear from you! Feel free to leave a comment or question.

Ummm … This is AMAZING! What a fantastic transformation. I love the hidden white board and the sit/stand desk and the extinguisher lamp and window treatment! The ceiling and light fixture are my favorites, though! But, really there is SO much to love about this room. Very cool!! You nailed it. I look forward to reading the tutorials. 🙂
LikeLike
Thanks, Blair! 🙂
LikeLike
Great job!!! I love all of the little secret yet purposeful spaces!
LikeLike
Thanks, Cara!
LikeLike